.jpg?width=624&height=405&name=iStock-2187408448%20(1).jpg)
Operator Connect allows you to make external PSTN calls within your Teams tenant, while your chosen telecom operator manages all connectivity and infrastructure as a cloud service. This setup removes day-to-day telephony upkeep and gives you a cleaner way to bring voice into Teams. It also gives your organization a predictable path to modern calling, even if your current estate includes mixed carriers, old circuits or scattered workflows.
This guide breaks the process into clear, step by step actions and highlights the common pitfalls to avoid so your project keeps momentum and delivers a stable service.
- What Operator Connect is and how it works
- Operator Connect or Direct Routing
- Operator Connect set up - step by step
- Risks to avoid
What Operator Connect is and how it works
Operator Connect sits between Microsoft Teams and a certified carrier and gives you a direct path to PSTN calling without building new voice infrastructure. It keeps management inside the Teams Admin Center while your operator handles the carrier side. This structure keeps your estate simpler and removes many of the tasks that slow down voice projects.
Operator Connect gives you the ability to:
-
Place and receive external PSTN calls through your Teams tenant while your carrier maintains the underlying voice network.
-
Manage numbers, policies and call flows in one place inside Teams, which gives your admins a cleaner way to run day-to-day operations.
-
Add or remove numbers quickly because your carrier provisions them directly into your tenant.
-
Avoid customer SBCs for standard user calling, which reduces setup and ongoing maintenance.
-
Keep Direct Routing only for workloads that need special routing, analog devices or strict compliance rules.
This combination gives organizations a straightforward path to Teams Phone and reduces the technical friction that often slows down migrations.

Which providers support Operator Connect for Microsoft Teams?
Microsoft publishes a list inside the Teams Admin Center that shows all certified operators by region. This list updates as new carriers join the program and gives you a direct way to compare coverage, number types and available services. You can choose from global providers, regional specialists or a mix of both.
Pure IP was one of the original providers in the program and supports a broad set of countries, number formats and regulatory requirements.
When you review providers, you can look for details that shape how well the service fits your estate:
- Coverage by country
Check which regions each operator can support, including local dialing rules and emergency calling requirements. - Phone number types
Confirm whether the operator provides local geographic numbers, non geographic numbers, Toll Free ranges and service numbers. - Commercial model
Review contract terms, number pricing, porting steps and support processes to see which provider aligns with your procurement standards. - Support structure
Look at how incidents are handled, how tickets are escalated and how the operator manages carrier outages or porting delays. - Operational workflow
Ask how fast the operator can provision numbers into your tenant, how they manage ports and whether they support bulk migrations.
Choosing the right provider is a key early decision. The operator you select influences deployment speed, day-to-day operations and the long-term stability of your Teams calling environment.
What are the benefits of using Operator Connect with Microsoft Teams?
Operator Connect reshapes the work behind enterprise calling by shifting key tasks to the carrier and simplifying what remains inside Teams. It also creates a more stable operating model that scales cleanly across regions and mixed environments.
- Lower operational effort: The carrier maintains the PSTN infrastructure, which removes most of the telephony upkeep that normally lands on internal teams.
- Centralized management: Numbers, call flows and policies sit in one place inside the Teams Admin Center, which keeps the voice environment organized and easier to maintain.
- Faster deployment cycles: Standard users no longer require SBC builds or on-premises routing, which shortens setup time and speeds up migrations.
- Clearer support boundaries: PSTN issues flow directly to the operator while internal teams stay focused on user experience, which creates a cleaner support structure.
- More predictable global rollouts: A certified operator handles regulatory rules, number availability and porting steps across regions, which reduces risk and keeps deployments steady.
For a complete overview of Operator Connect, read our dedicated guide >>
Operator Connect or
Direct Routing
Every estate carries a mix of sites, devices and regional rules that shape how voice must operate. Different calling models support different needs, so the design often depends on the blend of legacy equipment, compliance requirements and the pace of migration. Many organizations end up with a combined approach because it keeps operations simple while still supporting workloads that need more control.
Operator Connect supports straightforward user calling and provides a clean way to activate PSTN access without additional infrastructure.
Direct Routing remains useful for workloads that depend on analog devices, advanced routing logic or strict recording requirements.
A blended approach for estates that need both. Operator Connect covers standard users and global calling, while Direct Routing supports sites with legacy devices, regulated routing requirements or workloads that cannot move to the cloud yet.
In summary, use:
- Operator Connect for fast deployment and simple management.
- Direct Routing for areas not supporting on Operator Connect and to integrate analog devices, specialized routing or complex requirements.
- A blended approach for estates that need both.
Operator Connect setup step by step
1. Choose your preferred Operator
Operator Connect is accessed from directly within your Teams Admin Center, and offers voice services from a growing number of providers, including Pure IP.
To view the full list of operators, navigate to the Voice option in the left hand menu, then select Operators. You will then be able to filter through them based on region using the dropdown at the top.
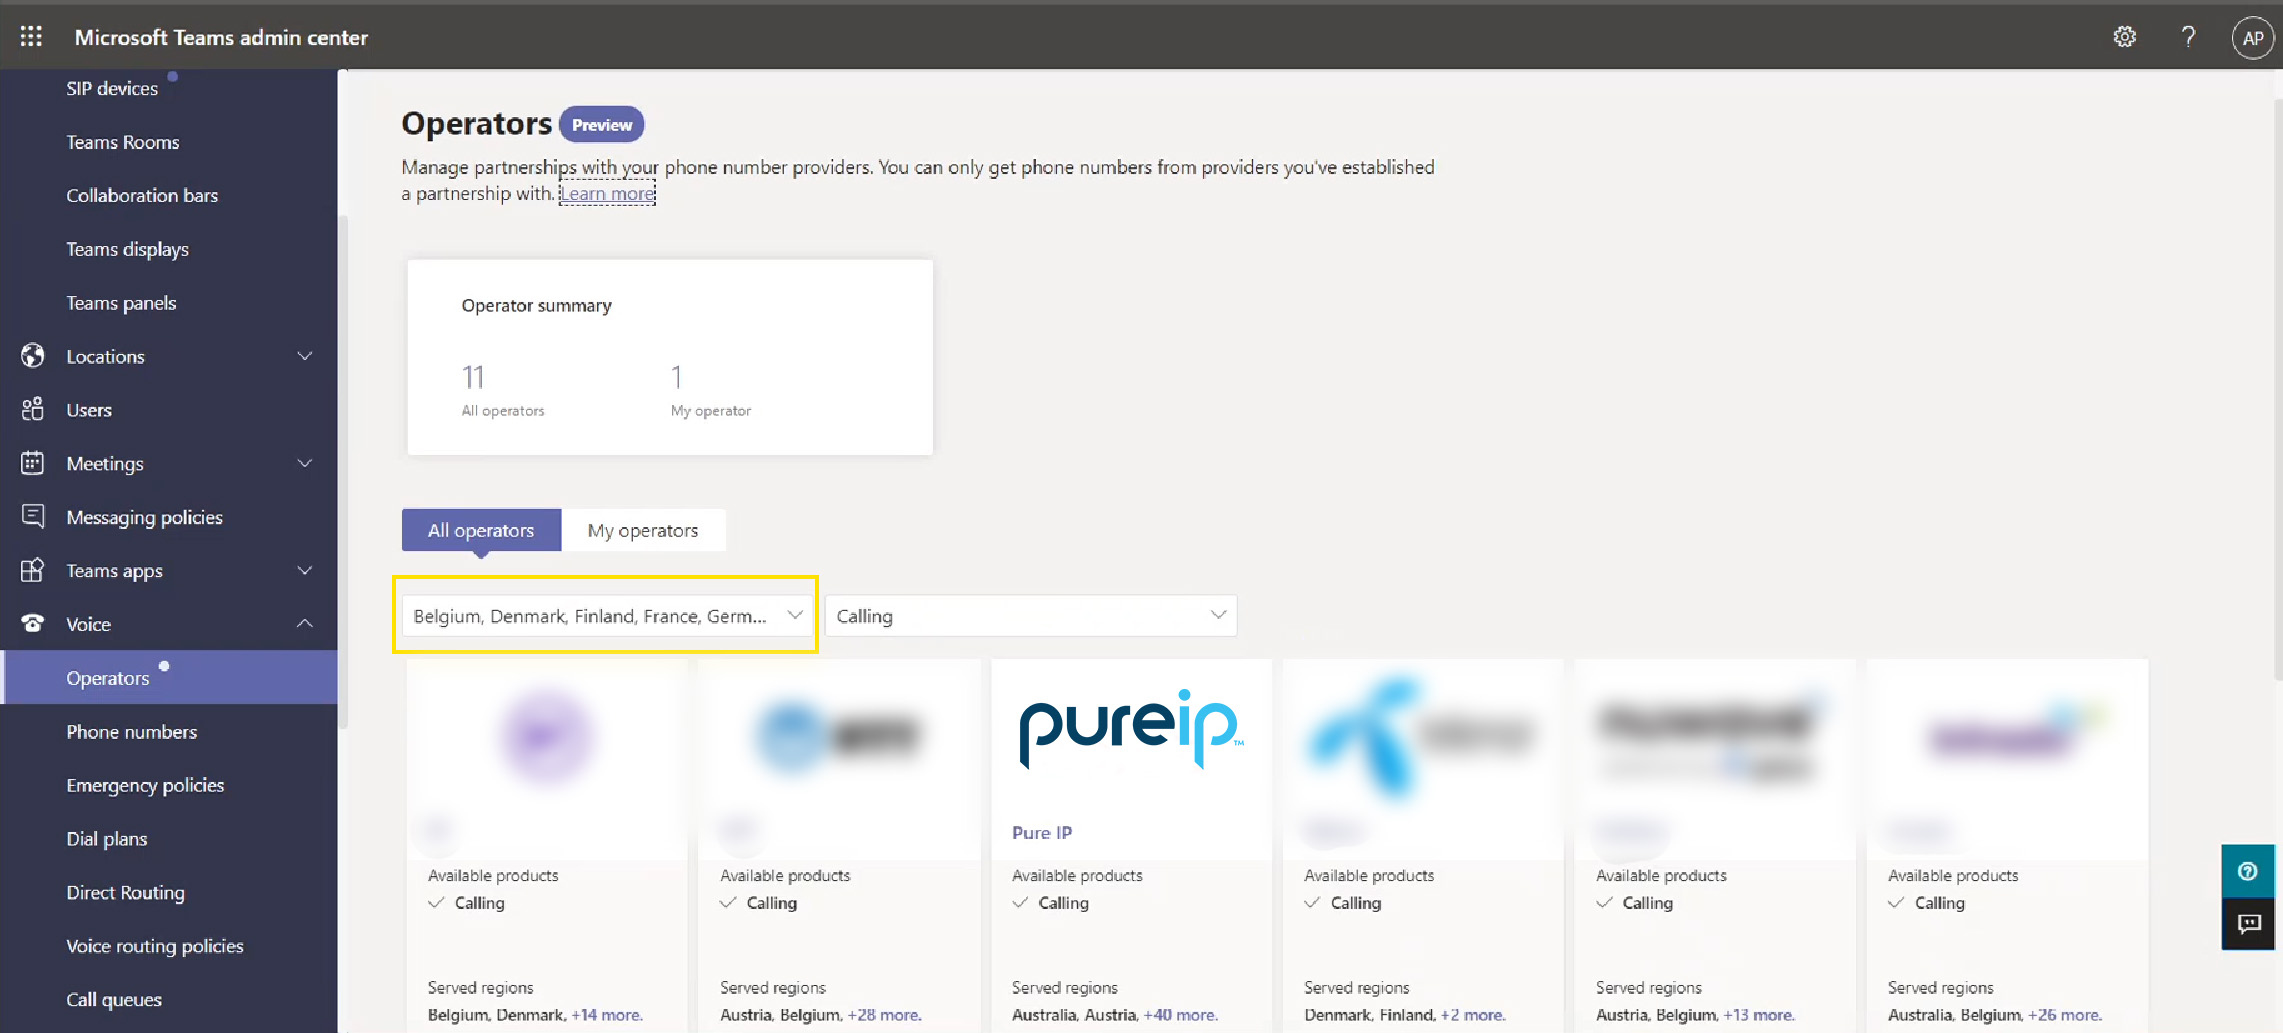
To add an operator, select them, select the countries you are interested in, then provide your contact information and accept the data transfer notices. Once you have clicked Add as my operator, they will be saved to your tenant.
However, it is important to note, that at this stage you have not contracted any voice services from the operator. The operator will contact you separately with their pricing and terms and conditions. You will also need to provide them with your tenant ID, which you can find by following these instructions.

2. Provision your numbers
Only after you have added them as an operator and talked to them offline, can they provision the phone numbers you need.
Once your operator has provisioned your phone numbers, they will appear in the Phone Numbers tab.
This screen shows the phone numbers that you have provisioned from carriers in Operator Connect, or have purchased directly from Microsoft (Calling Plans and service numbers).
You can look at the Number Provider column to see which operator has provided those numbers.

Important to note:
- Operator Connect numbers always live at the tenant level. Plan your blocks early so you know which numbers belong to users, which belong to call flows and which stay unused until you need them.
- Porting rules vary by country. Some require strict identities and timed windows. Treat porting as a planned mini project.
3. Adding your emergency locations
Before any number can be assigned to a user, emergency locations must be added to the tenant and linked to each number. This ensures that calls to emergency services route to the correct local authority and provide accurate location details.

- In the Locations section of the left-hand navigation pane, select the Emergency addresses tab.
- Add the full address, as well as the longitude and latitude for each of your office locations.
- Once the address has been added, you can then assign your phone numbers to the relevant office. To view all the numbers assigned to that address, simply click into the address.
- Optional - Add the floors of each location into the Places tab, and associate numbers, subnets, and Wi-Fi access points to those floors. Taking advantage of this option means that, assuming you have a different IP address on each floor, then even if your users are hotdesking between floors, their emergency address will be updated because the Teams client routinely checks which subnet and IP address they are using.
- Roaming users rely on dynamic location where available. Teams uses network details to estimate their position.
4. Configure your network topology
This is where Microsoft Teams learns how your network is laid out. Think of it as a simple map that shows your offices, the IP ranges used inside them and the Wi Fi access points people connect to. This map helps Teams understand where a user is working, which makes routing, policies and emergency features behave correctly.
Adding subnets and Wi Fi access points gives Teams more detail about each site. A subnet is a range of IP addresses used in a specific area of an office. When a subnet is linked to a location, Teams can recognize that anyone using an address in that range is likely in that office.
This information supports several important functions:
- Dynamic emergency calling uses it to attach the right address to an emergency call.
- Location based routing relies on it to apply the correct regional rules.
- Local optimization uses it to keep calls close to the user by linking them to nearby voice equipment instead of sending traffic across the internet.

There are compliance reasons to configure your network topology too; in India, for example, calls must break out to the PSTN in India. A user in India should not be able to call their European office over IP and then break out into the PSTN.
In order to ensure compliance with these sorts of regulations, you have to be able to accurately identify the users in the India office, and restrict their permissions with location based routing.
This setup also helps in hybrid environments where people move between home and the office:
- When someone works remotely, Teams detects that the IP address is not part of any known office location and routes voice traffic through the Microsoft cloud.
- When that person works to the office, Teams sees the familiar IP range and can route calls through local voice equipment. Media bypass uses this information to send the call directly through the local SBC, which reduces unnecessary network hops and improves call quality.
5. Build your core calling policies
Teams Phone uses several policy layers to control user experience. You define these before rollout so each user gets the right permissions and caller identity.
Caller ID policies
This tab controls how a caller’s number appears to the person receiving the call. These settings can mask a user’s direct number, display a service number instead or make the call anonymous.

In most cases where you are masking a user’s DDI with a service number, you will be using a call queue number (set up as a Voice App number), so that callers ring back on a general number that can be picked up by an operative from that call queue. Simply select the relevant number from the list.
Calling policies
These policies act as calling permissions for each user. Configuring them before deployment keeps roles clear and prevents gaps in access. Settings in this area include music on hold, private calls, voicemail, call forwarding and the option to place calls through a web browser.

Auto-attendants and call queues
Configure all the necessary settings for your auto attendants and call queues, including the structure of each call flow, the opening hours for each team and the actions that should run during holidays.
- Auto attendants act like interactive menus that guide callers to the right place, so each option in the menu needs a defined path.
- Call queues hold callers until an agent is free, so settings such as music, timeout rules and overflow behavior must be set.
- Holiday schedules also need to be created so callers hear the correct messages and are routed to the right place when offices are closed.

6. Assign calling policies to users
Now that policies exist, you attach them to each user. This gives each role its correct permissions and caller identity.
- To edit the policies that are assigned to any given user, navigate to the Users section of the admin center, select the relevant user, click Policies, then Edit.
A dialog will appear on the right with a long list of drop down fields where you can select from the policies that you have already defined.
- To do this in bulk, you can use scripts in PowerShell. You will need the details of the user names and the list of policies you would like to assign to them, and the script will essentially go through the manual process set out above for you.

7. Assign numbers to users
You have now provisioned your numbers from the operator, assigned an emergency location to each number, created all of the policies you need and assigned them to each user, and you are ready to assign your numbers to your users.
- To assign a number go to the Phone Numbers tab, then select the relevant number and click Edit at the top of the screen. This will open up a dialog that allows you to assign a user and an emergency location to the number.
- To unassign a number, select the relevant number and click release at the top of the screen. This will then unassign the user and remove all of their configuration from that number.
As with assigning calling policies, if you would like to complete this in bulk, you can use scripts in PowerShell.

Risks to avoid
A small set of issues slows most Operator Connect projects. Early preparation removes these blockers and keeps the build phase moving.
- Assigning numbers before addresses exist
Teams will not let a number attach to a user without a valid emergency location. Creating the address data first prevents last minute rework. - Missing Resource Account licenses
Auto attendants and call queues will not function without the correct license applied to each Resource Account. Checking this early avoids failures during testing. - Leaving subnets unmapped
If subnets are not linked to office locations, dynamic emergency calling and location based routing will not behave correctly. Mapping them early keeps routing predictable. - Overlooking porting blackout windows
Some regions restrict when ports can take place. Planning around these windows prevents missed dates and keeps migration waves on track. - Not confirming number formats for each region
Some countries require specific formats or identity checks before numbers can be activated. Verifying these rules early stops last minute rejections and avoids gaps in coverage. - Skipping test calls before go live
Unverified call flows, caller ID settings or routing rules can cause failures on day one. Running a simple test plan for each site catches these issues before users feel the impact.
If you want support with design, porting or global coverage, Pure IP can act as your Operator Connect provider and handle the carrier work behind the scenes. Our team provisions numbers directly into your tenant, helps you shape your calling structure and guides you through each stage of the rollout.
To get started, speak with us about setting up Operator Connect in your Microsoft Teams environment.
We can help you move at pace, keep your estate organized and deliver a calling service you can trust.


